Installation
Personally I hate adding libraries by simply dragging and copying files into my code. The mixing between my own code and external libraries can quickly become confusing and difficult to disentangle. My favourite way to add libraries is Cocoa Pods. It’s very easy to install and even easier to use. I won’t get into the details as it’s well documented (on its own site as well as in many other tutorials). If you really don’t want to use pods then standard instructions for installing MagicalRecord are also well documented on its own site and elsewhere.
To install using Cocoa Pods, navigate to your project files using the terminal and type
edit podfile
Type the following into the podfile and save.
platform :ios, '5.0'

pod 'MagicalRecord', '~> 2.1'
Next, run the following command in the same folder
pod install
Cocoa Pod will do all the work and tell you ‘MagicNotes.xcworkspace’ so close down your xcodeproj file and open the workspace. Congratulations. MagicalRecord is now installed.
To save repeating yourself you can add the line #import <CoreDate+MagicalRecord.h> to AppName-prefix.pch (under Supporting Files). To turn off MagicalRecords logging, add #define MR_ENABLE_ACTIVE_RECORD_LOGGING 0 to Pods-prefix.pch.
Create the Core Data Files
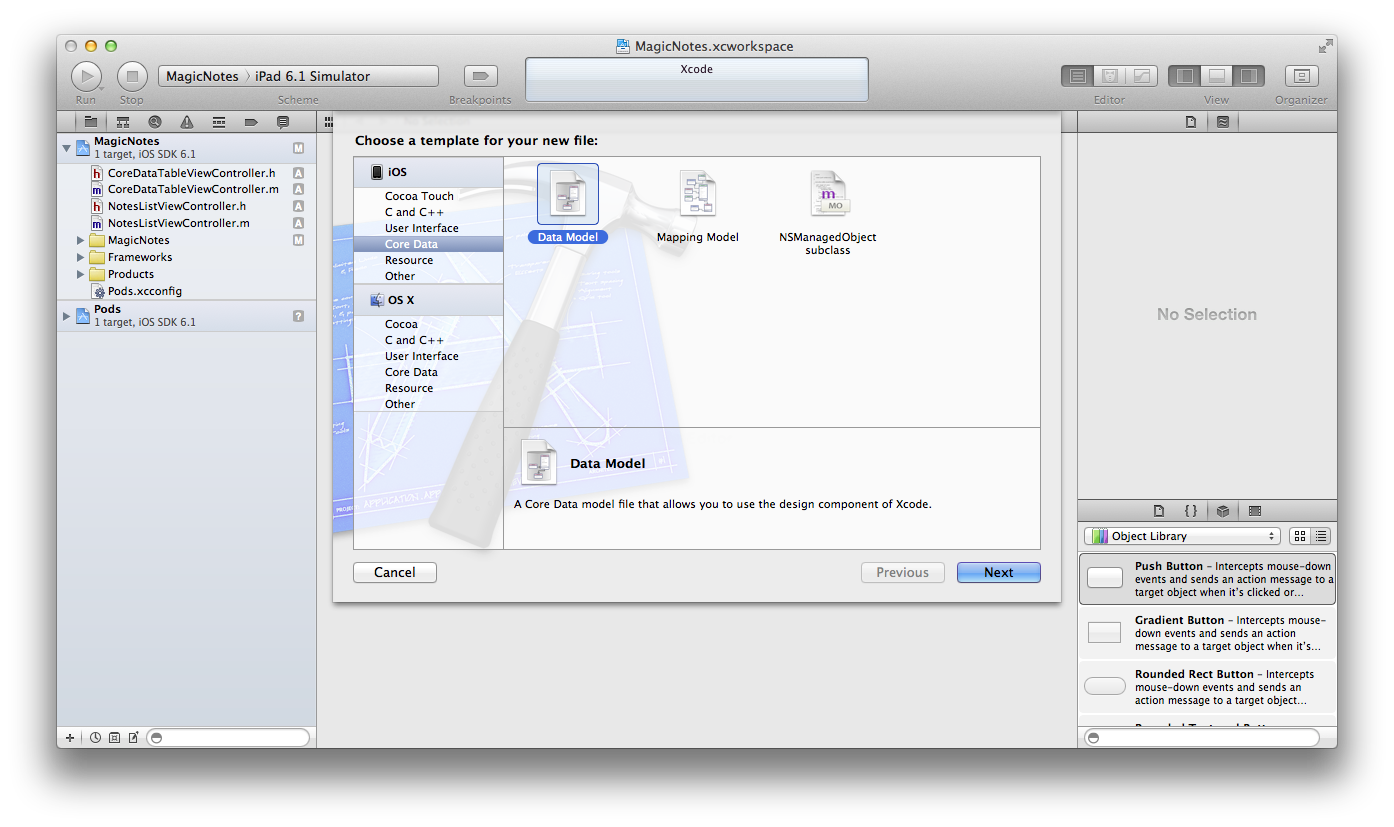
Creating the Core Data files is no different under MagicalRecord. First create a data model (File>New>File>Core Data>Data Model); its name isn’t important for a simple app such as this as we will only be using a single data model.
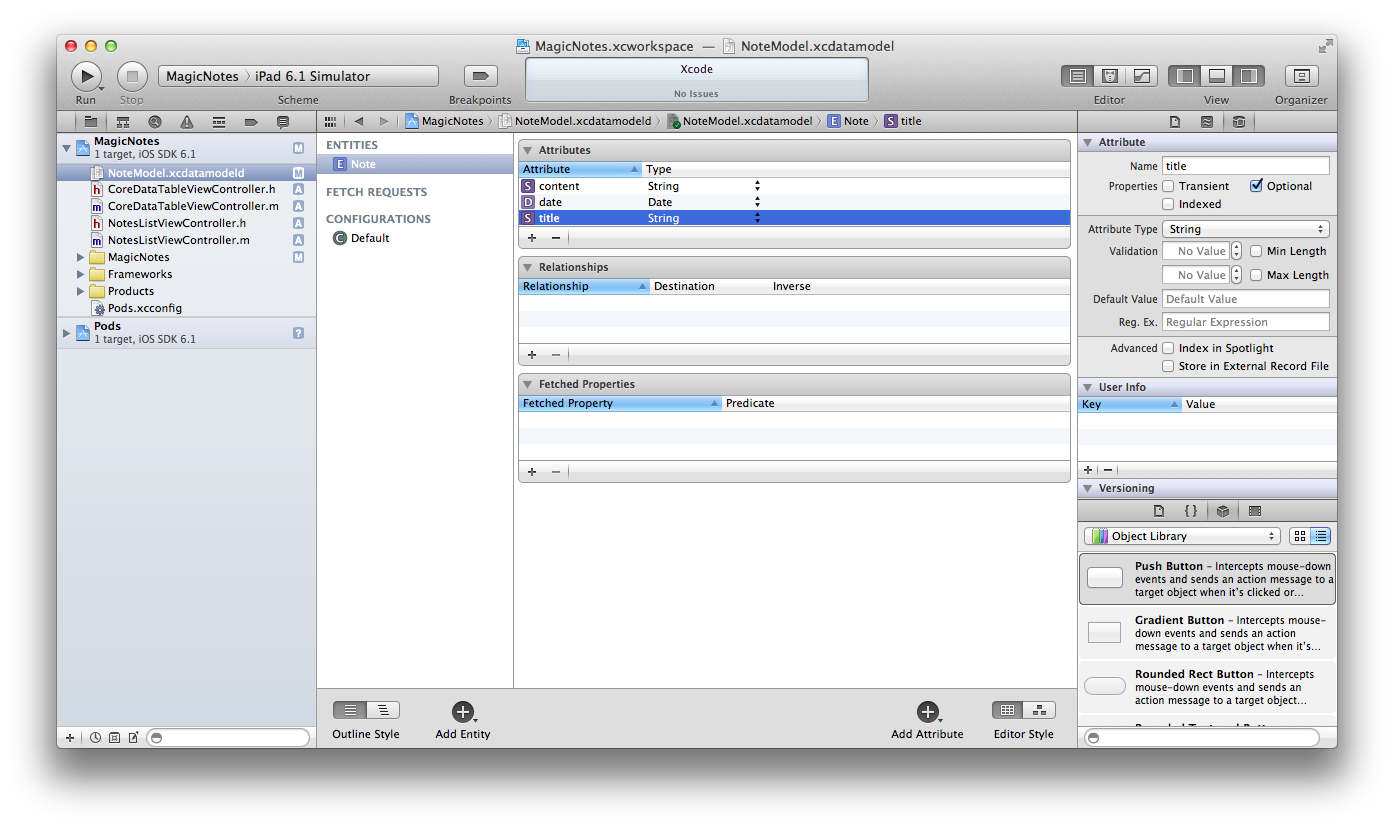
For this simple app we need one entity called Note. It has 3 attributes: title, date and content.
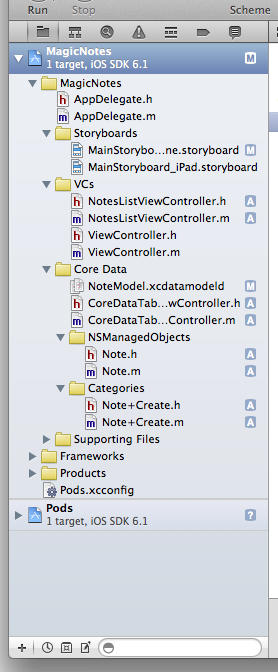
 Select the entity title and create an entity subclass (Editor>Create NSManagedObject Subclass…). Finally, I would recommend creating categories for any NSManagedObject subclasses. This allows you to add code to the subclass without worrying about it being wiped if you need to regenerate the base subclass files. Your project should now look something like this (I’ve added folders to make the structure clearer).
To your new category you need to add one method that’ll come in handy later. This method just gives an easy and consistent way to return the date formatted as a NSString:
-(NSString*) formatDateAsString;
-(NSString*) formatDateAsString{
    NSDateFormatter *formatter = [[NSDateFormatter alloc] init];
    [formatter setDateStyle:NSDateFormatterMediumStyle];
    [formatter setTimeStyle:NSDateFormatterShortStyle];
    [formatter setDoesRelativeDateFormatting: YES];
    return [formatter stringFromDate:self.date];
}
Create the Database
If you’ve ever used Core Data, then you’ll understand just how much code is needed just to initialise a database. With MagicalRecord it is a one line process. Just add the following two lines to your AppDelegate file to initiate the database on startup, and clean up when the app exits.
- (BOOL)application:(UIApplication *)application didFinishLaunchingWithOptions:(NSDictionary *)launchOptions
{
    [MagicalRecord setupCoreDataStack];
    return YES;
}

- (void)applicationWillTerminate:(UIApplication *)application
{
    [MagicalRecord cleanUp];
}
Fetching Results
Now we have a database we need to set up our NSFetchedResultsController in order to query it. Again, this is a simple one line process. Go to NoteListViewController.m and import the Note NSManagedObject subclass category we made earlier.
#import "Note+Create.h"
Then make the following change to the setupFetchedResultsController method.
- (void)setupFetchedResultsController {
    self.fetchedResultsController = [Note MR_fetchAllGroupedBy:nil withPredicate:nil sortedBy:nil ascending:YES];
}
Now setup the table to display the results by making the following change to the tableView:cellForRowAtIndexPath: method
- (UITableViewCell *)tableView:(UITableView *)tableView cellForRowAtIndexPath:(NSIndexPath *)indexPath
{
    static NSString *CellIdentifier = @"Note Cell";
    UITableViewCell *cell = [tableView dequeueReusableCellWithIdentifier:CellIdentifier];
    if (cell == nil) {
        cell = [[UITableViewCell alloc] initWithStyle:UITableViewCellStyleSubtitle reuseIdentifier:CellIdentifier];
        cell.textLabel.font = [UIFont systemFontOfSize:19.0];
        cell.detailTextLabel.font = [UIFont systemFontOfSize:12];
    }

    // We will configure the cell details here
    //** Add the code below **
    Note *note = [self.fetchedResultsController objectAtIndexPath:indexPath];
    cell.textLabel.text = note.title;
    cell.detailTextLabel.text=[note formatDateAsString];

    return cell;
}
Testing Our Code
At this point you can run the app, and once again see a blank table. So lets just check we haven’t made any mistakes by quickly adding a test method to add records to the table. In NoteListViewController.m add the following method, and call it in viewDidLoad.
-(void) addTestRecord {
    Note *test = [Note MR_createEntity];
    test.title = @"Note 1";
    test.date = [NSDate date];
    test.content = @"Test content for note 1";

    Note *test2 = [Note MR_createEntity];
    test2.title = @"Note 2";
    test2.date = [NSDate dateWithTimeIntervalSinceNow:-2*24*60*60];
    test2.content = @"Test content for note 2";

    NSManagedObjectContext *localContext = [NSManagedObjectContext MR_contextForCurrentThread];
    [localContext MR_saveToPersistentStoreWithCompletion:nil];
}
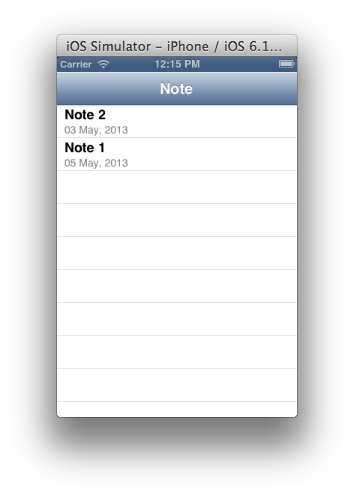
This simply creates two new Note entities with different values (one with todays date, and one two days ago), and saves them to the current context. Now you should gain two new table rows every time you run the app.
This is the basis of our test app, and in the next tutorial I will show you how to add new rows the right way, and also how to edit table content.